In this post I am going to show you how to apply AngularJS to your Visual WebParts in SharePoint.
Create a SharePoint 2013 Solution.
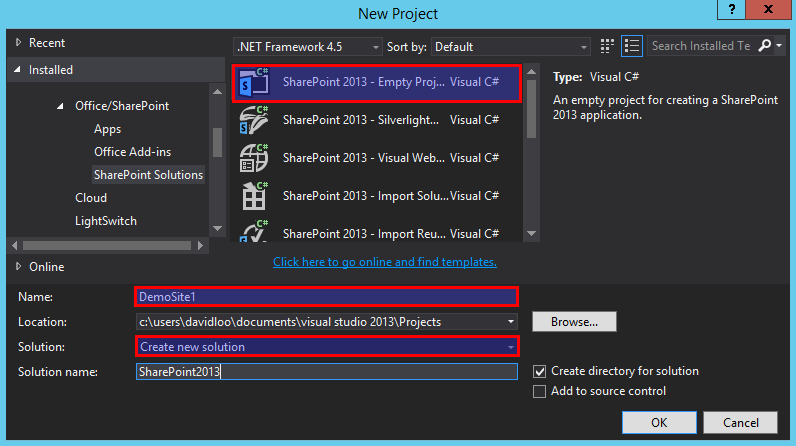
From Visual Studio menu File->New->Project and then use the SharePoint 2013 – Empty Project Template. Name the project DemoSite1 and the solution SharePoint2013 and click OK to continue. While Visual Studio is preparing your solution why not go and make yourself some coffee!
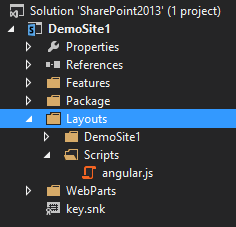
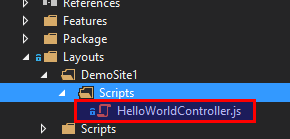
Right click on the DemoSite1 project and from the popup menu select Add->SharePoint “Layouts” Mapped Folder. After you have created the Layouts folder you will see another sub folder called DemoSite1. So in the Layouts folder create a Scripts folder, and then create another Scripts folder inside the DemoSite1 folder.
The Layouts\Scripts folder is where we should put the AngularJS javascripts, this means that it will be shared across SharePoint sites. Then in the Layouts\DemoSite1\Scripts we will put the site specific javascripts like our AngularJS Controllers, but we will get to that later.
Now download the AngularJS javascript library from here, then add the files to your Layouts\Scripts folder.
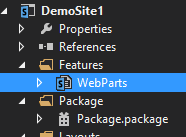
Now so far so good, Ok now right click on the Features folder and select Add Feature and rename it to WebParts.
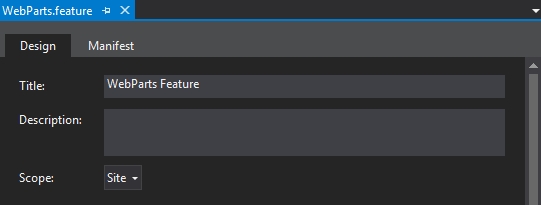
Double click on the WebParts feature and you will see the feature in design view. Enter “WebParts Feature” in the Title’s field and select the Site as the scope.
Create a WebPart with AngularJS
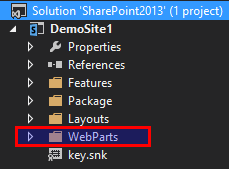
Now finally we get to play with AngularJS, before you get too excited we need to create a folder called WebParts in the project root.
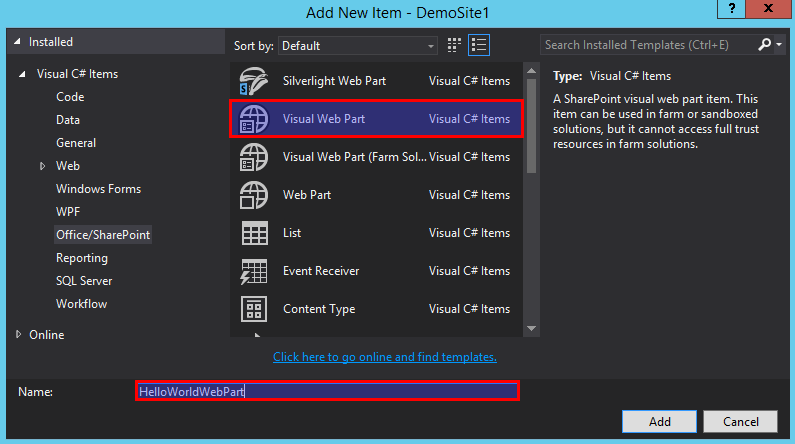
Right click on the WebParts folder and select Add->New Item. When the Add New Item dialog appear select the Visual Web Part, and name it HelloWorldWebPart and click Add.
So now its time to write some code!
There is going to be two places where we are going to write our code, first we will create an AngularJS Controller called HelloWorldController.js file and the second place is in the HelloWordWebPart.ascx file.
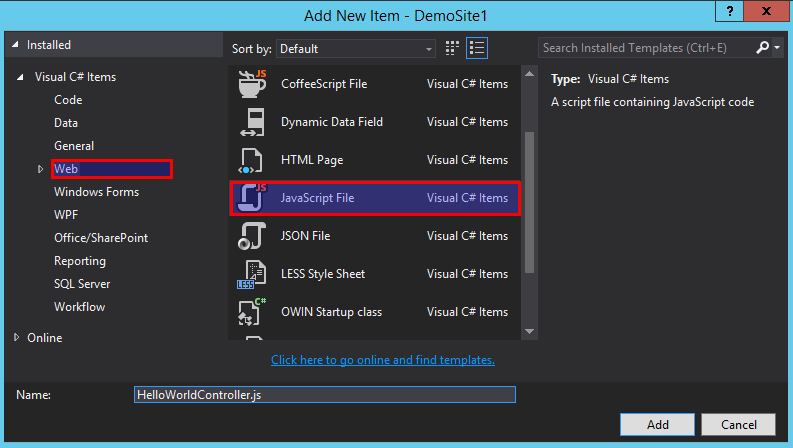
Expand the Layouts\DemoSite1\Scripts folder in your project and right click on the Scripts folder and select Add->New Item. When the Add New Item dialog opens select the Web->JavaScript File template and name it HelloWorldController.js and then press Add.
Now double click to open the HelloWorldController.js and enter the following code listed below.
HelloWorldController.js
var app = angular.module('app.demo', []);

app.controller('HelloWorldController', [
    '$scope', function ($scope) {
        $scope.name = '';
        $scope.message = 'Hello, World!!';
    }
]);
So what the javascript code above does is defining a controller called HelloWorldController and create a property called $scope.name and $scope.message and then give both of them a default value.
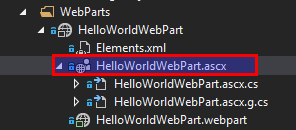
Now go and open the HelloWorldWebPart.ascx file and insert the following code below at the end of the file.
HelloWorldWebPart.ascx
<script src="../../_layouts/15/Scripts/angular.js"></script>
<script src="../../_layouts/15/DemoSite1/Scripts/HelloWorldController.js"></script>
<div ng-app="app.demo">
    <div ng-controller="HelloWorldController">
        <input type="text" ng-model="name" placeholder="Enter your name here."/>
        {{message}}
        {{name}}
    </div>
</div>
So what the javascript code above does is referencing the angular.js and HelloWorldController.js file and then we set ng-app=”app.demo” to point to our angular module.
Then we set ng-controller=”HelloWorldController” to use the HelloWorldController and then we put an input box that will take a ng-model=”name” from the $scope.name.
Then we use expressions to display the $scope.message “Hello, World!” and straight after it we display the $scope.name of the person who entered it.
Adding The WebPart To A Page Programmatically
Now lets write some C# code to add the HelloWorldWebPart to the home page of the Demo Site 1. First right click on the Features folder and select Add Feature.
Make sure you have rename the new feature to Setup before you continue.
Right click on the Setup feature and select Add Event Receiver and you should see a new file created called Setup.EventReceiver.cs.
Now double click on the Setup.EventReceiver.cs file to open it and uncomment the section shown below.
Setup.EventReceiver.cs
        //public override void FeatureActivated(SPFeatureReceiverProperties properties)
        //{
        //}

        //public override void FeatureDeactivating(SPFeatureReceiverProperties properties)
        //{
        //}
FeatureActivated and FeatureDeactivating is where we you can execute some code when the feature is activated or deactivated.
For the Setup Feature what I want to do is added the HelloWorldWebPart to the Home.aspx page when the feature is activated. Then remove the HelloWorldWebPart from the Home.aspx page when the feature is deactivated.
Enter the following code below in the FeatureActivated method.
FeatureActivated
        public override void FeatureActivated(SPFeatureReceiverProperties properties)
        {
            var web = properties.Feature.Parent as SPWeb;
            var webPartManager = web.GetLimitedWebPartManager("SitePages/Home.aspx", PersonalizationScope.Shared);

            var webPart = new HelloWorldWebPart();
            webPart.Title = "Hello World Web Part";

            webPartManager.AddWebPart(webPart,"Zone 2", 2);
            webPartManager.SaveChanges(webPart);
        }
So what the code above does is get the SPWeb object and then use GetLimitedWebPartManager to return the SPLimitedWebPartManager from the specified page. Then we use the SPLimitedWebPartManager ‘s AddWebPart() to add the webpart to the Home.aspx page. So basically the SPLimitedWebPartManager’s job is to manage webparts on a page, like adding or deleting a webpart.
Enter the following code below in the FeatureDeactivating method.
FeatureDeactivating
        public override void FeatureDeactivating(SPFeatureReceiverProperties properties)
        {
            var web = properties.Feature.Parent as SPWeb;
            web.AllowUnsafeUpdates = true;
            var webPartManager = web.GetLimitedWebPartManager("SitePages/Home.aspx", PersonalizationScope.Shared);
            var wp = webPartManager.WebParts.Cast<WebPart>().SingleOrDefault(x => x.Title == "Hello World Web Part");
            webPartManager.DeleteWebPart(wp);
        }
So what the code above does is a bit similar to the one in the FeatureActivated except I am using Linq to find the webpart by the title called “Hello World Web Part” on the Home.aspx page. Then I use the DeleteWebPart() method to delete the webpart.
Ok the coding part of this exercise is done, so now we need package everything up for deployment to the SharePoint server.
Packaging Your Project
So it’s time to package up everything we have created, in a SharePoint package you can select what to add or exclude from the package. You can rearrange the order of the items or features that get deployed or activated.
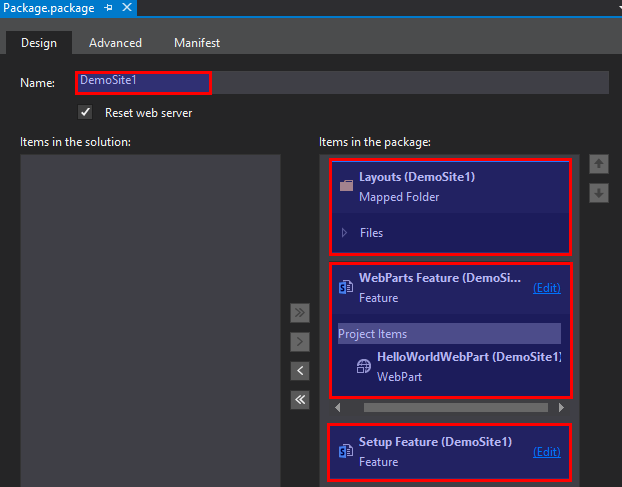
Double click on the Package folder and that will open the Package design view.
In the design view make sure you name the package DemoSite1. Then make sure that Layouts folder, WebParts Feature and Setup Feature is added to the package in this order shown below.
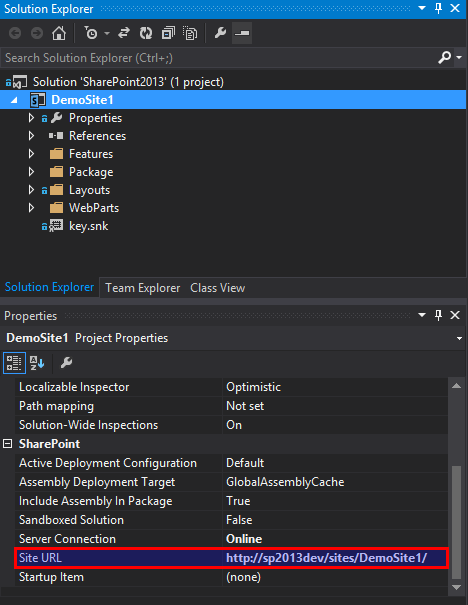
Now that package is all ready for deployment, we need to make sure that the Site Url that we are going to deploy to is correct. So select the project DemoSite1 and see the below where the properties are shown and find the Site URL section.
In the Site URL I have entered http://sp2013dev/sites/DemoSite1/, but yours could be different to mine.
Deployment Your Project
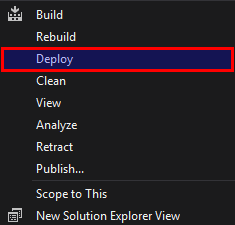
To deploy the project to your SharePoint server, right click on the project name DemoSite1 and select from the pop menu Deploy.
Now sit back and if you are craving for another coffee why not go and make another one, this might take a few minutes and make sure you keep your eyes on the Output Window in Visual Studio.
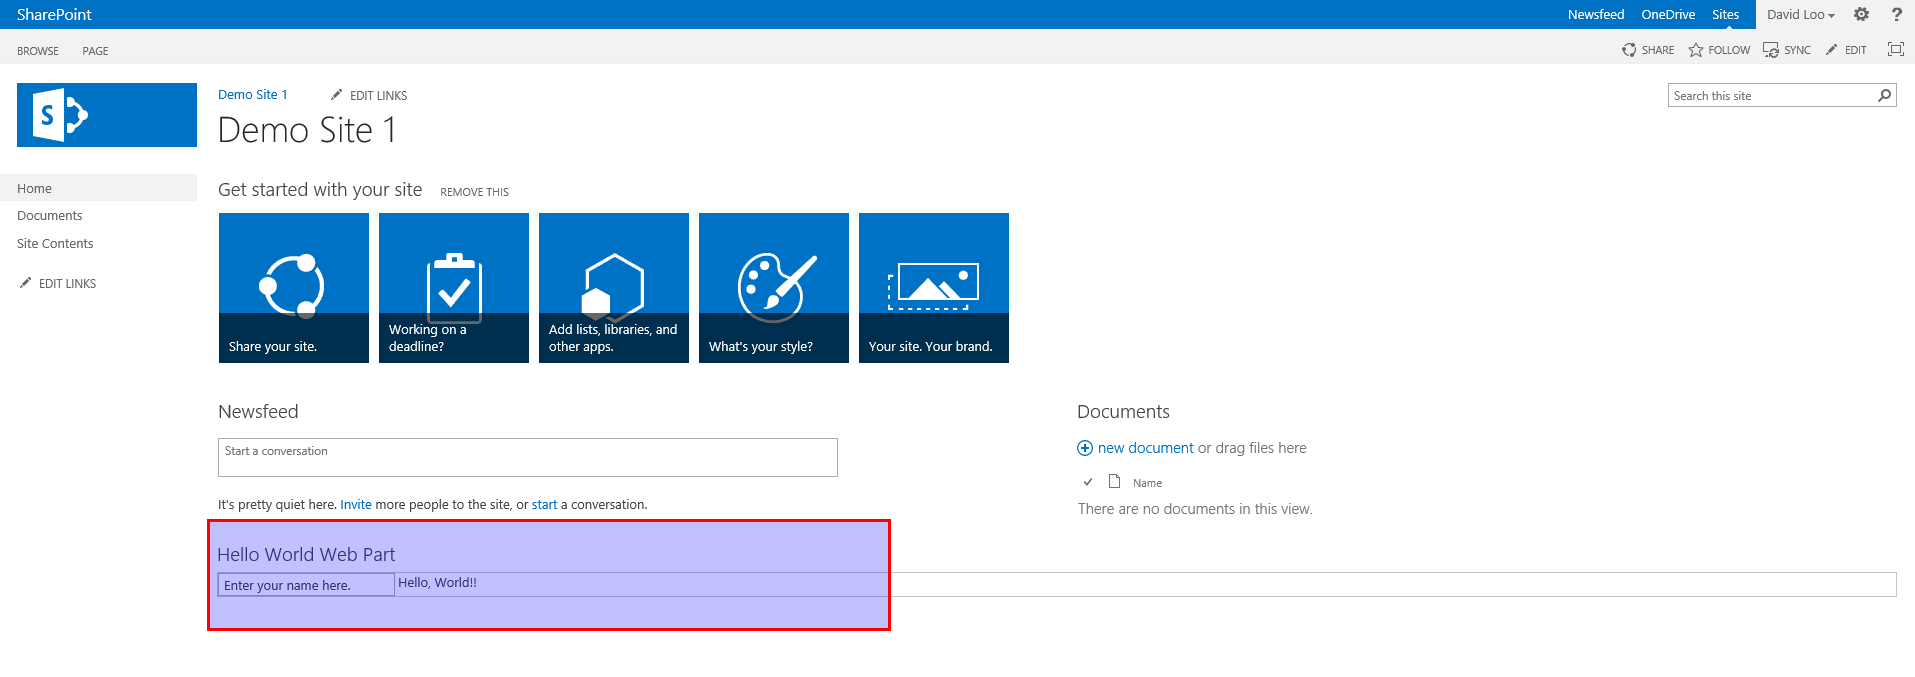
When the deployment is complete and successful go to your Site’s URL and see what you have deployed. What you have deployed should be the same as the screen shot below, right at the bottom of the page you can see the Hello World Web Part and if you enter a name in the input box you will instantly see that the name appears next the the “Hello, World!” message on the right.
Well done you have successfully created a SharePoint 2013 project using VIsual WebParts and AngularJS. In the next post I will demonstrate how to use AngularJS to retrieve List Item Data and display it in a WebPart.
This project is available in my GitHub repository.




Hi david,
If we add it says invalid attribute as you said to place it in .ascx file. do we have to add something although I added angular.js in that page?
Hi Rahul,
Did you copy the code and paste it at the end of the .ascx file as described in the post?
Let me know how you go.
Thanks.