Recently I wrote a small program to allow me to connect to a SQL database and export a selected table to a CSV file. So I needed a method that can take in a DataTable and the delimiter character to use. The returned result is a string which can be save straight to a text file.
Below is the method in my program, you may copy, modify and use it in your own program.
I use a StringBuilder class to build my lines of comma separated values and then return it as a String type. Currently the code only format string values with double quotes inserted around the value and the rest is a straight output.
Got a Windows Phone 7 and want to write some cools apps for it? Microsoft has release some tools to the public so that programmers like yourself can get started! You actually don’t need a Windows Phone because the kit comes with an emulator. Anyways let get start by downloading the developer’s kit from the App Hub and press on “Download the free tools”.
using System;
using System.Collections.Generic;
using System.Linq;
using System.Text;
using System.Security.Principal;

namespace ConsoleApplication1
{
    class Program
    {
        static void Main(string[] args)
        {
            System.Console.Out.WriteLine(WindowsIdentity.GetCurrent().Name);
        }
    }
}
Before I migrated to Ubuntu I was installing games on my Windows operating system using Steam. Before I had upgraded to Ubuntu 10.10 I was using 10.04 and I tried to install some games using Wine, but failed. Few months ago Steam was available on the Mac OS X, I was so happy that I was able to download or purchase games for my Mac.
Anyways I tell you how to install Steam on your Ubuntu operating system. First you will need to install Wine. Go to Applications->Ubuntu Software Centre. Enter Wine in the search box and then install Wine Microsoft Windows Compatibility Layer and PlayOnLinux.
Wine will allow you to install Windows application on Ubuntu, but not all applications will work so you probably have to go to their web site and check out which applications are working on it.
PlayOnLinux allows you to select a list of all compatible Windows application that will work in Wine. So after have installed PlayOnLinux, press on the Install button and select the Games category and find Steam and press Apply. There you go it’s easy as that! Well Enjoy!
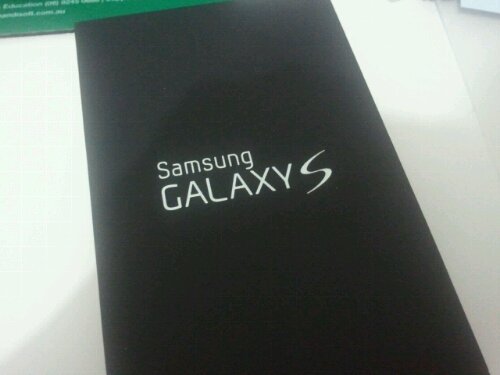
My Optus mobile contract has finished, and it was time to upgrade to a new phone. I was tossing between the Apple iPhone 4 and the Samsung Galaxy S. But I decided to go with Samsung because it has a bigger screen, very sharp graphics, YouTube loading time is faster compare to my Apple iPhone 3G; no restrictions not like the iPhone where you need to jailbreak to run apps that is not available on the Apple Appstore.
I am still going to keep my Apple iPhone for development, and now it’s time to start learn and develop on the Android platform.
Recently I just did a small job for a client online using IComparer interface to perform sorting on a GridView control.
First I need to create class called Person. This class is going to contain the following properties: FirstName, LastName, Age.
public class Person
{
    private string _firstName;
    private string _lastName;
    private int _age;

    public string FirstName
    {
        get { return _firstName; }
        set { _firstName = value; }
    }

    public string LastName
    {
       get { return _lastName; }
       set { _lastName = value; }
    }

    public int Age
    {
       get { return _age; }
       set { _age = value; }
    }
}
Now I need to create a class called PersonComparer that will inherit from the IComparer interface. This comparer class will be use with the Sort() method from a List collection.
 using System.Collections;
 using System.Collections.Generic;
 using System.Reflection;
 using System;

 public class PersonComparer:IComparer
 {
     private string _sortBy;

     public string SortBy
     {
         get { return _sortBy; }
         set { _sortBy = value; }
     }

     public int Compare(Person x, Person y)
     {
         int result = 0;
         string propName = string.Empty;
         string sortDirection = "ASC";

         if (_sortBy.Contains(" DESC"))
         {
             propName = _sortBy.Replace(" DESC", string.Empty).Trim();
             sortDirection = "DESC";
         }

         if (_sortBy.Contains(" ASC"))
         {
             propName = _sortBy.Replace(" ASC", string.Empty).Trim();
             sortDirection = "ASC";
         }

         // Get type of Person Object
         Type t = typeof(Person);

         // Find the property name from the sortExpress passed in SortBy property.
         PropertyInfo propInfo = t.GetProperty(propName);

         if (propInfo != null)
         {
             // Perform comparison on property value.
             result = Comparer.DefaultInvariant.Compare(propInfo.GetValue(x, null), propInfo.GetValue(y, null));

             if (sortDirection.Equals("DESC"))
             {
                 result = -result;
             }
         }
         return result;
     }
 }
What the difference between Cache and Session variables. Cache variables are available at the application level which means that another web user can access the same cache. Session variables are available at the client level which only the client can read or write to the Session variable.
When developing a web application in ASP.NET it’s good practice to use Cache to store data that will be shared across the application. For example if you need to read from cache a list of colour names from a table from a database, you can reuse this cache when ever your page loads. This way it prevents repetitive reads from the table which can reduce web application performance.
List<string> colourList = new List<string>();
Cache["ColourList"] = colourList;
colourList = Cache["ColourList"] as List<string>;
Session variables are used for storing user specific data such as user’s details, below is an example of how it’s used.
Session["Username"] = "joe.bloggs";
string username = Session["Username"].ToString();
Make sure you understand the difference between them two and which one to use for your purpose, never store user’s details in a Cache variable because another web user can access them but then this means that the web was poorly designed.
For further reading on Cache and Session variables I came across some web sites that may be resourceful:
It’s the Easter long weekend here in Perth Western Australia all the shops are closed today, so I am at home catching up with some house work and blogging.
Well in this blog I am going to demonstrate how to create a Progress Dialog Box to show the progress of your process and allowing the user to cancel out of the process.
First what you need to do is create a new Windows Form Application project or download the project from here.
Few days ago at work, I have been assigned a job to write a tool to split a .tif file that contains multiple pages. So below I have some code snippets that demonstrates how to use the .NET Framework and C# to achieve this, and we don’t need to use any third party libraries.
1) First you need to create a new Console Project called SplitTIFF.
2) Add the System.Drawing assembly to your Reference folder in your project:
3) In your code add the System.Drawing and System.Drawing.Imaging namespace.